#OTTAWA CHILDREN KIDS FAIRY PHOTOGRAPHER/#OTTAWA BLOG PHOTOGRAPHER/#OTTAWA PROFESSIONAL PORTRAIT STUDIO/#OTTAWA HEAD SHOT/BUSINESS/#OTTAWA LEISURE/ #OTTAWA DANCE SCHOOL/FAMILY/ MATERNITY PREGNANT PHOTOGRAPHY
AUGUST 2023
***PLEASE VISIT THE “SPECIALS PAGE” OF MY WEBSITE TO SEE WHAT IS CURRENTLY BEING FEATURED. 🙂
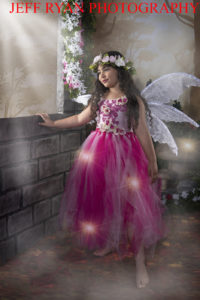
“BEAUTIFUL CHILDREN’S FAIRY PORTRAITURE” IS CURRENTLY ON SALE !!


Hello Ladies & Gentlemen:
Before I begin this months article, I would once again like to say “Thank You” for your kind remarks pertaining to my photography/blog articles. Your comments have been sincerely appreciated and I most definitely wish to extend my thanks to you the reader for your favourable opinions on my levels of instruction/guidance. As mentioned, being a teacher of photography for several years, and having to answer rather extensive questions from my students on a frequent basis, is what lead to the procreation of this blog. I do not reply to all word press comments due to a lack of time but would like to say here that even though I might not provide a response to your comment, I have received it and I am always grateful. So “Thank You” to all of you! It appears I have a very good crowd of sincere readers. Again….it’s very special that you choose to frequent my articles and website and my best wishes are always extended to you!
*I have recently had someone comment saying “Am I concerned my educational articles will be plagiarized”? My response to a comment such as this is; when I began my writings years ago, my intent was to provide a website where people could obtain helpful information regarding photography and it’s related products that would help them along their path of learning. The amount of information available to anyone on the internet today is rather considerable, and all people who upload information are already aware of the fact that anything can be copied. Should people choose to copy my articles and distribute them to their associates or friends in a positive fashion, that would be pleasing for me knowing I have been of help to someone. Regrettably, there are those who do not represent themselves well on the internet.
ARTICLE/BLOG POST FOR AUGUST 2023
PRINTING PHOTOGRAPHS FOR PUBLIC DISPLAY
Hello Ladies & Gentlemen:
I received an inquiry from a person in the arts community regarding constructing a display of their paintings and photographs. The question was fairly straight forward meaning, are there any suggestions I would have that would benefit their imagery. Where I am unable to comment on paintings, I am most definitely able to provide this person with advice about their photographs. I will itemize a few of my suggestions below for your convenience should you elect to put on a display of your work in the future.
*The reader should be made aware of the fact that all the information I relinquish in my blog articles is from first hand experience while on the job. So let’s dive into this months column and have some fun doing so!
PROFESSIONAL PRINT LABS
I have been witness to numerous exhibitions, displays, etc over the years and one thing I have noticed frequently is poorly printed imagery. I believe many people have come to the conclusion that printing their own photos is the best way to go for a couple of reasons. First, their costs would be reduced by printing their own images, and secondly, they feel that they can make a better determination as to the way the image will be received by the public meaning, their choice of colours, contrast etc.
Ladies & Gentlemen, while I will admit that home printers have come a long way since their infancy, professional commercial portrait printing labs hire professional people with a skill set for producing consistent, high quality imagery typically beyond most photographers ability. These individuals working in labs deal with thousands of photographs each year and they have a trained eye for producing imagery in a way that most photographers fail to recognize. Lab technicians develop a talent for spotting deficiencies in print quality in comparison to individuals who print their own photographs periodically. This places limitations on the infrequent print individual (photographer), who will regrettably permit undesirable colouring, tonality, contrast and related variances to occur in unwanted areas of their imagery.
My advice to those wishing to participate in trade shows or general public displays would be to have one of your images printed as a small sized photograph such as an 8 x 10 at a commercial lab. (I say small size because your cost would be minimal and many display prints are considerably larger in size. Display prints typically range from 16 x 20” upwards and naturally cost more due to their size. The numbers of 16 x 20 sound large but they really are not. If you were to take a piece of paper at these measurements and place it on a large wall in your home with almost nothing else on the wall itself, you will notice that the print size is barely adequate enough to leave an impression on the viewer. I often print 16 x 20 portraits however, I always frame them up to at least 20 x 24”. I have my frame shop use high quality acid free matt boards sized at 20 x 24”. I am sure you have been in art galleries and noticed the substantial size of the “Wall Portraits” on display. The days of Rembrandt and related artists intentionally produced paintings of this size to duplicate beautiful life size imagery which could be visible to the eye when one stands on the opposite side of the room. Larger portraits frequently carry more weight when on display. Once you have had the opportunity to review your smaller sized 8 x 10 proof photograph from a lab, this is the time to examine all the characteristics of it thoroughly. Should you feel any changes need to be made, consult the print lab making your imagery and express your concerns.
*It is always a good idea when dropping off digital files to a lab that you have a discussion of what you are looking for in your finished photographs, particularly if you are an infrequent visitor. This is important and it will help the trained staff in directing them to specific print methods to successfully achieve your desired result. Also, it is very beneficial for you to use the same lab(s) on a regular basis getting to know the staff. They will intuitively know what “look” you are seeking in print form and do their best to acquire it in every print job.
LIGHTING IN PUBLIC DISPLAYS
For people who have not participated in display work, I would very much like to take this opportunity to offer you some concrete advice regarding having your imagery printed properly.
***Your imagery “MUST” be printed according to the quality of the light source illuminating it! Let’s look at a few typical light sources I have utilized over the years and review their effects on your work.
The predominant light sources I have had to contend with over the years are fluorescent, Led-(light emitting diode), Tungsten, Daylight and Quartz.
QUALITY OF ILLUMINATION
*All light sources are measured in a scale called “Kelvin”. In a general sense, daylight camera exposures are created around 5000-6500 degrees Kelvin. Tungsten camera exposures which are common table lamp or spot light bulbs, are created with typically 3200-3400 degrees Kelvin. These lower Kelvin numbers mean that your imagery will take on a pronounced yellow-orange-red appearance. Anytime you find yourself indoors with the primary light source being artificial lights, you have to make lighting corrections to accurately represent the colours of your photographs.
**This is important when printing your photographs for indoor viewing such as trade shows. Photographs printed for daylight conditions will not appear to have a proper colour balance/appearance to them when viewed under these artificial environments. This is why you must do a bit of research prior to printing your imagery for your chosen location.
FLUORESCENT
While all artificial light sources have their advantages, they can also have disadvantages as well. A fluorescent light source typically produces a magenta-(purple tonality) and green cast over your imagery. I have had to create portraits of people in large rooms illuminated by these lights and have had to place “colour correction” gels on my lens to correctly balance the illumination characteristics of these lights to a daylight balance camera setting. Placing correction gels over your lens at the time of exposure will remove the magenta colour cast and make your imagery look as if there is no colour imbalance. This is a smart way of operating as opposed to submitting extremely imbalanced imagery to a lab and “hoping” they have the ability to correct errors. At times, a lab can only go so far in securing proper colour balance unless extensive photo shop techniques are implemented.
TUNGSTEN & QUARTZ
These two light sources are quite similar in characteristic so I will group them together.
As mentioned above, lower Kelvin numbers mean that your imagery will take on a pronounced yellow-orange-red appearance. If it’s the case where you desire a warmer toned photograph, placing it under these light sources will give you that result. Photographs and paintings of yesteryear were often produced with a warmer tone to them giving flesh a more enhanced appearance. When I do trade shows, I have frequently used tungsten spot lights to illuminate my imagery. Both tungsten and quartz lighting are warm tone in characteristic. These lights give off a attractive glow and they are my preference. Should you decide to select these lights for an upcoming show, you should choose lights that can be narrowed down into a spotlight effect in comparison to ones that provide a very wide washed out effect. Spotlighting will permit you to direct the light to specific areas of your imagery, thereby directing the viewers eye to the most important aspect of your work. In photography and painting, there are always at least two thoughts of design you should be implementing in your compositions which are; the primary subject itself, followed by a “secondary visual motif”. A secondary motif is another area of your image that does not take precedence in your photograph/painting by challenging or being in competition with your main subject, but rather gives your viewer and additional complimentary visual resting place strengthening your primary subject.
LED
The LED type of lighting for your photographs is often a very cold toned product. These lights are frequently placed as ceiling lightening in trade show buildings and they produce in my opinion, a most unattractive, very flat, uncomplimentary style of lighting which is most undesirable to your work. You can purchase them as cold or slightly warmer tone products but they will never have the ability to create the warm, subtly of tungsten lighting. Admittedly, they do not consume as much power as tungsten, but when doing public displays and trying to showcase your imagery to it’s maximum potential, they do not deliver the same appeal.
DEGREES KELVIN LIGHT TEMPERATURE METERS
*I realize up front Ladies & Gentlemen that this tool might very well be impracticable for the majority of people doing trade shows/public displays due to its initial expense. The purchase of a meter of this level of sophistication would depend on how accurate you want your work to appear to the public. Also, if you are a younger person 25-35 years of age and you know you will be an active participant in numerous trade shows each year, you might want to give this tool some consideration. Making a purchase of it at this time in your life when you have approximately 30 plus years of shows ahead of you, diminishes it’s up front costs when divided by years of use.
**For those interested in obtaining an exact colour temperature in the environment where their work will be displayed, a hand held colour meter will determine the exact temperature of the light source. At the time of this writing-(August 2023), B & H Photo lists a Sekonic C-7000 Spectrometer Colour Meter valued at $2300. Ebay.ca has pricing similar to B & H. Vistek camera store stocks a Sekonic C-800 Spectro Colour Meter for $2200.
Lets do the math for a brief moment…….30 years of trade shows divided by $2300 equates to a fee of $76 a year. When put in perspective, the initial cost does not seem to appear so prohibitive over a larger period of time.
*This style of meter is remarkable in it’s level of accuracy. I have used one before and it provides you with all the colour balancing information you would require when discussing your public display imagery with your print lab.
***A HELPFUL TIP FOR YOU: In my city, the better stocked/more professional camera stores will rent you a colour meter at a fraction of what you would be expected to pay for a new model. Rentals range from $30 a day upwards depending upon how long you will need the meter for. Also, weekly rentals usually decrease the daily rate to an even lower figure should you require it for this duration of time.
****I hope this information will be of great help to all you in the future! 🙂 🙂 🙂
Thank you for your interest in my column Ladies & Gentlemen!
With My Good Wishes Extended Your Way,
Jeff Ryan Photography/Ryan Studio Ottawa
www.jeffryan-photography.com
