OTTAWA PROFESSIONAL STUDIO PHOTOGRAPHER BLOG/FAIRY PORTRAITS/ DANCE SCHOOL PHOTOGRAPHER / FASHION / MODEL / ARCHITECTURE / HEAD SHOTS / FAMILY / KANATA/ STITTSVILLE/ BARRHAVEN/ MANOTICK/ NEPEAN/ RICHMOND/ ORLEANS
OTTAWA PHOTOGRAPHERS STUDIO BLOG POST/ ON LOCATION /FILM AND DIGITAL PHOTOGRAPHER/OTTAWA 613 PHOTOGRAPHER/FAIRIES/ FAIRY PORTRAITS/ OTTAWA FAIRY PORTRAIT STUDIO/ OTTAWA COMMERCIAL PHOTOGRAPHY
OCTOBER 2021
***DON’T FORGET TO VISIT MY “FAIRY PORTRAIT GALLERY”!!!! WE HAVE JUST RECEIVED GORGEOUS, BRAND NEW “HAND MADE FAIRY DRESSES” FOR YOUR LITTLE GIRLS!!!!! BOOK YOUR SESSION NOW! LIMITED FAIRY PORTRAIT SESSIONS AVAILABLE! BOOK NOW!!!!!! :):):)

Hello Ladies & Gentleman & “Welcome” To This Autumns Blog Post! It’s a pleasure to have you here. 🙂
*I have included a few images for your benefit when reading this article depicting back lighting, front lighting, side lighting pertaining to the evaluation of light angles and the quality of light. Use the images and text as compliments of each other which will be to your benefit when reviewing the imagery. I have also included basic descriptions of exposure control, composition and equipment which will hopefully aid you in making better imagery, equipment purchases or using your current gear. It is my hope that these suggestions will help you in your Autumn image making ventures and otherwise. Enjoy!
A Backlit Photograph
ARTICLE
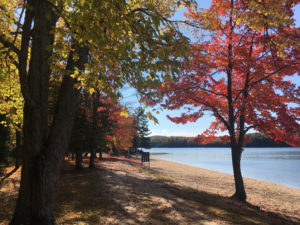
This time of year being autumn, brings out many camera enthusiasts eager to enjoy the remarkable diversification of fall colours. It’s an exciting time and a season that is often too brief in many people’s opinion. It indicates that the summer we new is now going into a period of retirement and the birth of winters arrival is coming to our doorsteps. For many, winter is an unwelcome time forcing many people inside into unfortunately a lengthy seclusion but, from a photographic viewpoint, it is also a time to re-evaluate or heighten your ability to “see”. All seasons present wonderful visual opportunities to us!
In regards to “photographic seeing”, both you and I can visit specific locales rather frequently throughout the year and fail to notice the design of the landscape due to it’s similarity during summer months for example. When fall arrives and trees are dressed in different garments all together, it makes one stop and examine the surroundings more fully than before. Trees for instance that appeared green for months are now transformed into splendid displays of colour arresting our movements, making us rethink their visual design and place in the landscape. This is an opportunity to evaluate your thought process regarding image creation asking yourselves why have you now chosen to stop here to make photographs whereas before you would simply walk by. Perhaps you are an individual drawn to dramatic colours which excite you indicating that you should lean your skills towards objects with strong designs and abstract shapes. Start asking yourself questions about why you wish to make a particular photograph.
 A Side Lit Photograph
As a photographer, my interpretation of the seasons is orchestrated with thoughts of structured design elements in my picture space. I believe in a process of steps, typically in a specific order, arriving at well thought out compositions, as opposed to one of randomly clicking the shutter and hoping to achieve something that might look promising afterwards. I have taught this procedure of methodical design practice to my students over many years including other photography related suggestions regarding equipment that I would like to share with you today. Hopefully you will give these suggestions consideration prior to recording your next set of images. The aim of this article is to help you by sharing information I have acquired over the years.

A Front Lit Photograph
COMPOSITION
 A Backlit Photograph
*Three Excellent Steps To Stronger Compositions bear the order of A) Composition, B) Depth Of Field, C) Exposure
As a rule, my imagery is created by addressing first and foremost the subject matters composition, followed by the amount of depth of field I choose to introduce into each image and finally and certainly the least important factor, the exposure. The exposure in my opinion is meaningless if the two other steps have not been dealt with as priority because if your image is not well composed, and depth of field settings are inappropriate for the image your attempting to create, then exposure is irrelevant because the image itself is unsatisfactory. Exposure would be a waste of time due to weak image creation.
As mentioned, your subjects careful composition must take precedence and should be the first item dealt with when looking through your viewfinder. I have frequently created imagery over many years with cameras having either “rectangular or square” formats. In each case, a visual examination regarding the perimeter of the viewfinder is very important. Too often people allow distracting elements to enter the viewfinders edges subtracting the importance of the subject itself. Study each corner and sides of your viewfinder and make determinations as to what does and does not belong in your photograph either strengthening it or weakening it’s design. I treat my viewfinder as a respected piece of equipment being a visual template giving me the opportunity of designing and introducing specific pictorial elements into my image. Composition should be treated with respect and deserves well order.
DEPTH OF FIELD
A Backlit Water Photograph


A Front Lit Flower Photograph Above
I have addressed this topic in previous articles however it seems to be an area that is frequently overlooked and misunderstood and needs readdressing. It really isn’t as complicated or intimidating as it may seem.
Depth of field or as some say, depth of focus, provides the photographer with an excellent method of visual control. To keep this as simple as possible not wanting to offend the maturity of the reader, depth of field is an area of space before your subject and after your subject that you, a photographer have the ability to control. What do I mean when I say control? Simply this. If your camera provides you with the option of setting the lens opening, you have the ability to either increase the area of sharpness “before and after” your subject or you may choose to limit the amount of sharpness in these same areas. When you set the lens opening to a high number for instance such as F22, you will gain greater levels of sharpness in your imagery particularly in the background of your image. Conversely, if you set your lens opening to a smaller number such as F 3.5 or F2.8 for example, the background of your imagery will now be very blurry and out of focus. Photographers for years have implemented this technique in their picture making efforts to emphasize specific areas of focus thereby enhancing the subject matter itself. Landscapes frequently are improved when higher lens openings are used-(F22,F 32 etc.) Portraiture is improved when smaller number lens openings such as F2.8, F4 etc are used. Experiment with both types of the above mentioned scenarios. A quick glance at the back of your digital cameras viewing screen will display the above settings quite nicely.
EXPOSURE—THE FINAL STEP
As mentioned, let this be the last item on your list of things to address when creating imagery. Use the above “depth of field technique” I have described to arrive at an exposure that will produce the visual effects your after since depth of field and exposure are directly tied to each other. Select a shutter speed and aperture (F number) on your lens. When your cameras light meter indicates that you have a correct exposure meaning that it will not overexpose or underexpose your image, you are now ready to trip the shutter and record your image.
ANGLE AND COLOUR OF LIGHT
Another Backlit Photograph

***After viewing the above images regarding the angle of light, which do you prefer?
I am certain you have unquestionably noticed as the day progresses that the colour of the sky changes rather dramatically from it’s appearance at morning to sunset, but have you invested thought of incorporating the suns angle of light to enhance your imagery? Each photographer generally has his/her own preference as to what time of day best represents their particular style of image creation. This is where your personality is introduced into your photography, setting you apart from others. Photographers often have a recognized style like famous painters of yesteryear. For example, people will often comment at art galleries that this painting is obviously a Rembrandt without even taking the time to verify this by reading the name situated beside the painting. It is worth your time to begin a process of thought when confronted with subject matter before you. Consider as well the temperature of the light itself and how it affects the mood of your image. Bright light at noon is considerably cooler in temperature than the warm light of sunrise or sunset. Which do you prefer? Pondering these suggestions will help direct you towards a goal of image creation more suitable to expressing your personal interests in visual design.
In this age of digital manipulation, I still “strongly recommend repeatedly” to novice photographers in particular, to not depend upon computer manipulation programs to save your images. This is a falsification of your abilities as a photographer. You are either a well thought out photographer or a computer manipulation person. One or the other. Make the decision to excel at your photography as opposed to depending upon Adobe or other related programs to save your imagery. Take the time up front to evaluate your process of image creation and undoubtedly you will be rewarded with strong image content that will most likely require very little manipulation later.
LENS SELECTION
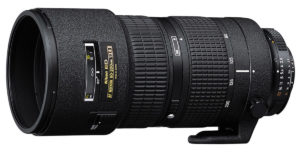
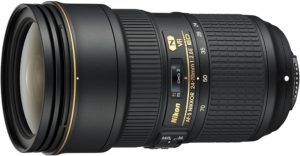
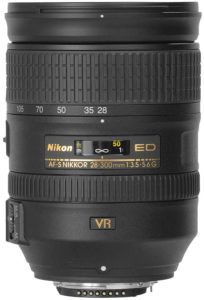
Years ago in the photographic industry, lenses were frequently limited in design. If a photographer wanted a particular image to appear closer to their camera for instance, they either had to decrease the physical distance between the subject matter by walking to it or use a telephoto lens. This is just one example of many I could present here however in today’s marketplace, unlimited quantities of excellent lenses representing any type of photographic situation are available for purchase. I have worked with individuals over many years who admittedly call themselves “equipment junkies” wanting every new item released to the public. This is a habit that I would highly discourage to all of you interested in image creation. A good recommendation would be to have a couple of excellent quality zoom lenses with impressive focal ranges so they can be used as wide angle, normal and telephoto lenses built in one. Zoom lenses are excellent choices and have been redesigned over the years enhancing their sharpness and contrast control previously unknown before. When purchasing lenses, don’t forget to investigate the second hand market as well. There are numerous options available for you to make your selection from at reduced prices. Make certain the lens can be purchased with a warranty and upon receiving it, thoroughly test it to see if there are any concerns. More often than not, second hand lenses are good choices. If the lens appears to be in excellent physical condition, one can most likely assume that optically it is operating fine but run it through a series of tests to ensure this. The lenses displayed in this article are manufactured by Nikon however other companies produce optics comparable to the above. The Featured Zoom lenses are: 18-200 F3.5, 24-70 F2.8, 80-200 F2.8
FILTRATION I COMMONLY USE
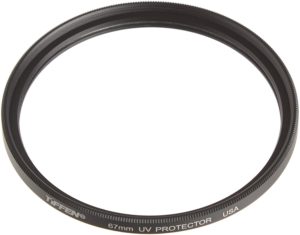
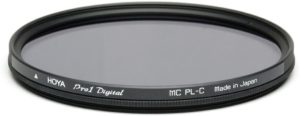
This is kept to a minimum. I would suggest that the following filters are very beneficial for not only image enhancement, but also for lens protection. Firstly, an excellent quality UV or Skylight filter is a must to ensure that the lens element itself be protected from dust, debris, water and damage/scratching. Next, a good quality polarizing filter will enhance your imagery bringing out additional colours plus cutting unwanted reflections that may hinder your compositions.
TRIPOD
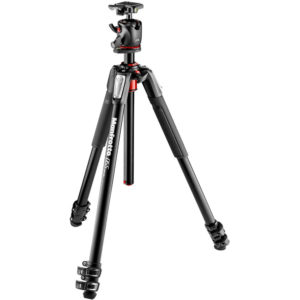
The majority of my imagery is created using a tripod. This is something that all serious image creators must use without exception. It unquestionably permits excellent composition and will give you a more structured approach in your photography. The particular manufacturer of my tripods is Manfrotto made in Italy. There are certainly other professional companies producing high quality gear as well which you can research. My tripods are excellent high quality professional products using a “ball and socket head design”, which are very versatile in their movements. Do not compromise on inferior, inexpensive products. They are not worth it! If you are a person interested in recording imagery which is close to the ground such as small flowers for example, make sure the tripod has a reversible centre column enabling you to place your camera inches from the ground itself.
CABLE RELEASE
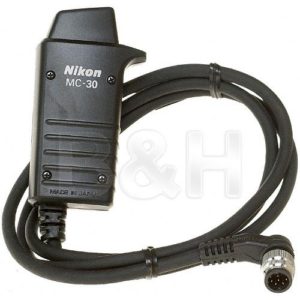
To reduce the possibility of camera movement when tripping the shutter, a cable release is invaluable. The cameras of today contain a multitude of electronics in them and you will probably have to purchase a cable release that will operate electronically in conjunction with your cameras system. Either way, cable releases ensure sharper imagery due to limited camera vibration.
I hope you have enjoyed the above information and please introduce these techniques into your image making process. Have fun and respect for your camera. The people who designed these products clearly deserve recognition for a job well done!
***DON’T FORGET TO VISIT MY “FAIRY PORTRAIT GALLERY”!!!! WE HAVE JUST RECEIVED NEW “HAND MADE FAIRY DRESSES” FOR YOUR LITTLE GIRLS!!!!! BOOK YOUR SESSION NOW! LIMITED FAIRY PORTRAIT SESSIONS AVAILABLE! BOOK NOW!!!!!!
With My Good Wishes Extended,
Jeff Ryan Photography/Ryan Studio Ottawa
www.jeffryan-photography.com